Proof Album Verification
This page will cover how to verify a proof album. If you are unfamiliar with checking proof albums to ensure they are valid for trading inside the room, this is the place to be. We will dissect multiple different proof albums from different encounter types to give a detailed explination on how to properly verify each one.
It is important to understand the destinction between Retail, CFW & Emulator albums, as the requirements will change based on the tools at the users disposal.
| Term | Definition |
|---|---|
| Retail | Performed on official hardware with no aids (overlays & scripts) to help with the obtainment process. |
| CFW | Performed on official hardware running Custom Firmware, may come with aids such as overlays to help with the obtainment process. |
| Emulator | Performed using a PC using official games, typically comes with aids such as overlays or lua scripts to help with the obtainment process. |
Album VS Guidelines
Firstly, you will need to identify the following information:
- The type of encounter (is it a static/wild/roamer/egg/gift?)
- If the Pokemon was RNG abused (was it soft resetted?)
- What method the player used to obtain the Pokemon (retail/CFW/emulator?)
These questions can be answered by looking at a proof album. For example, if a player has taken a picture or video of their console, and there are no visible overlays on-screen, we can safely assume this was achieved on a retail device.
Figure 1 - Identifying the type of encounter
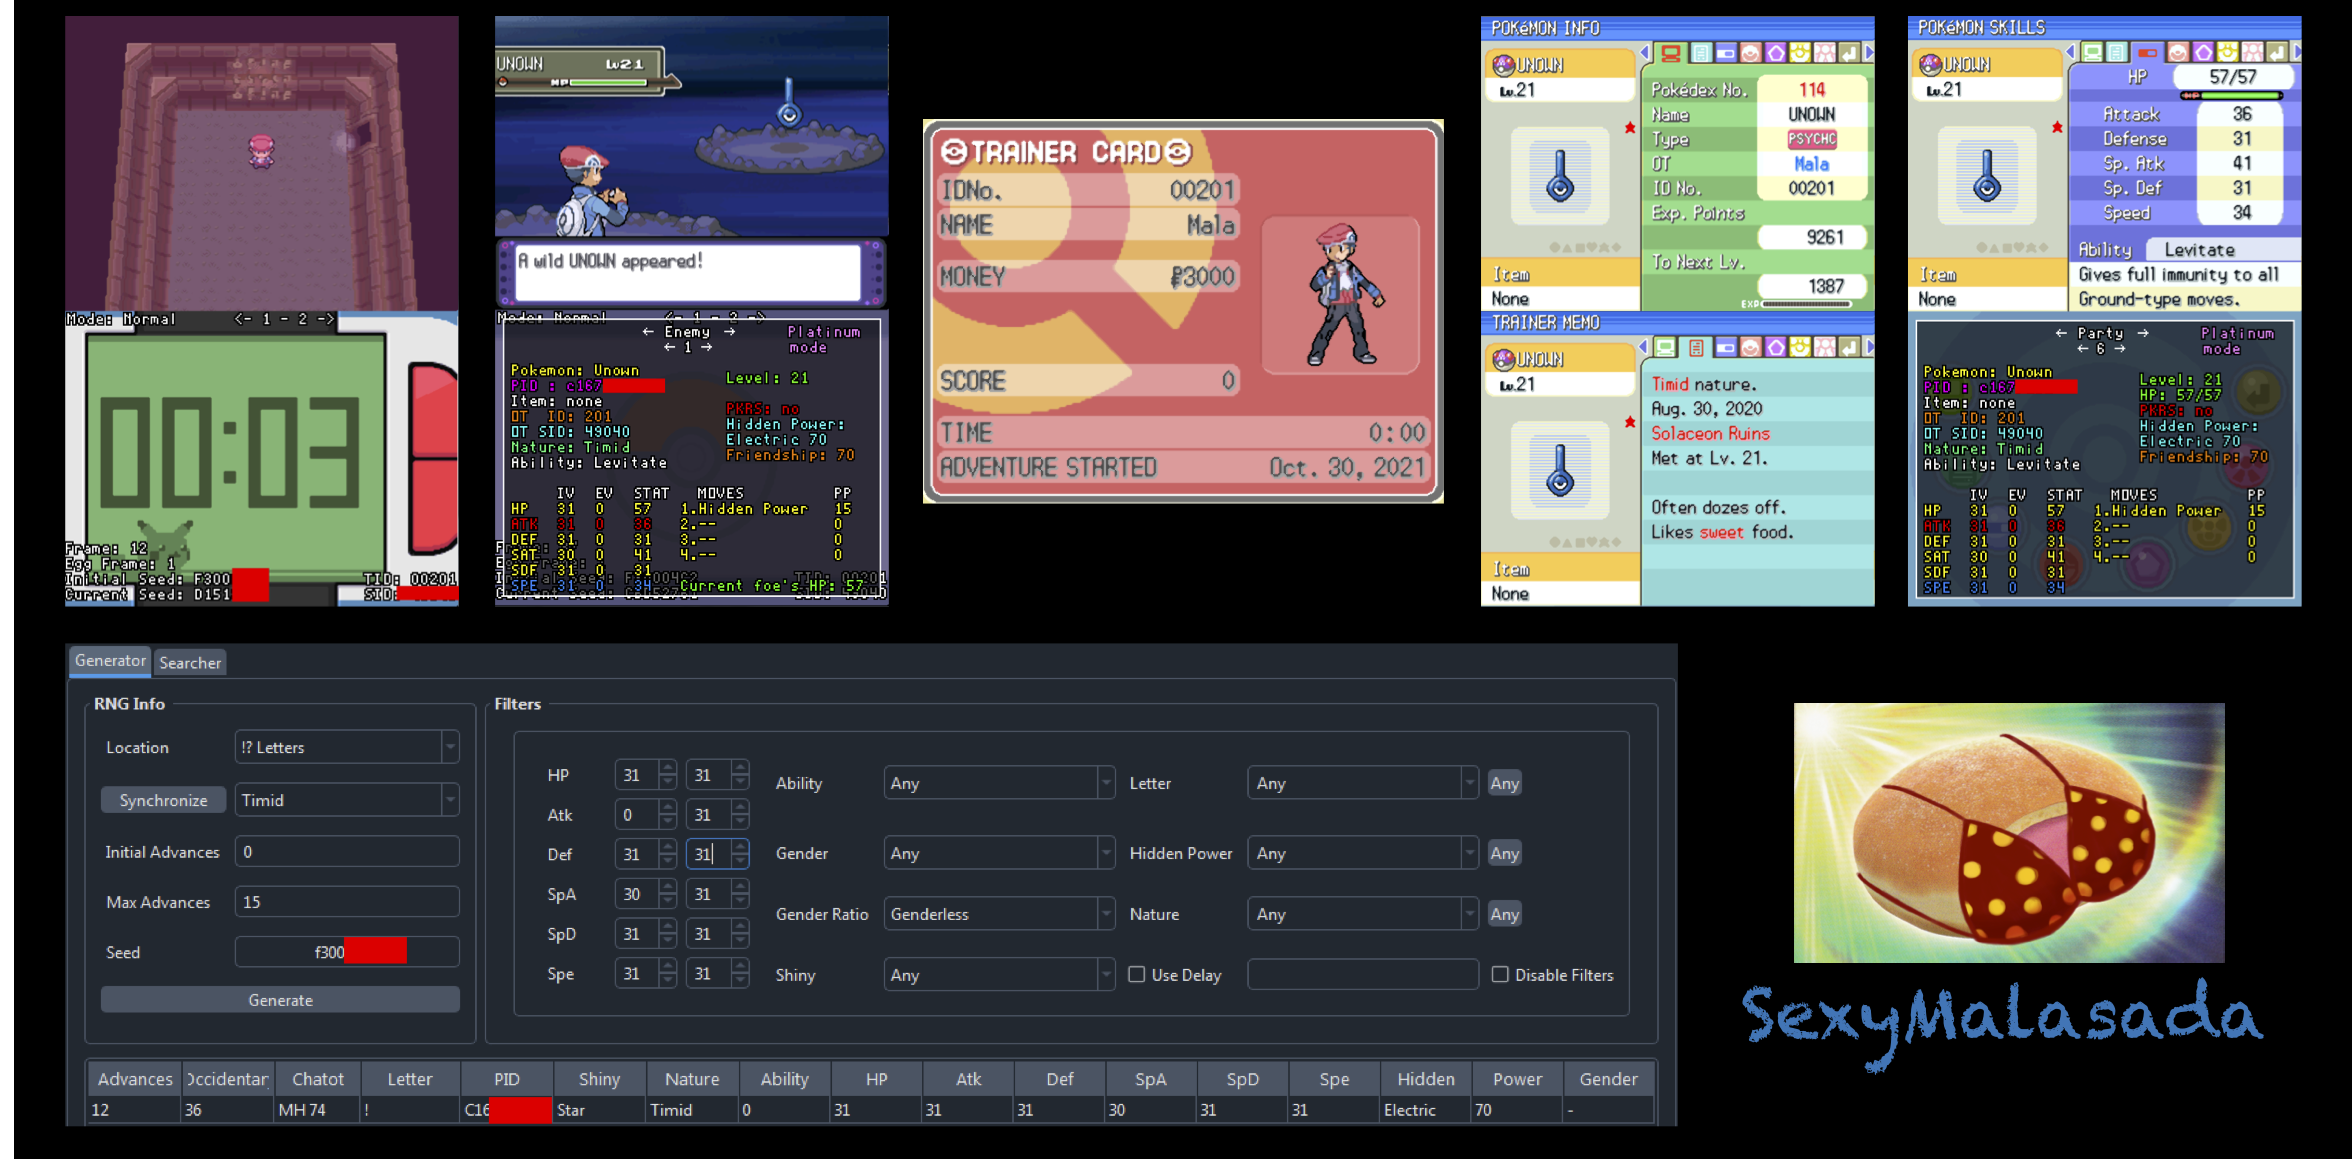
We are able to quickly identify that this is a wild encounter (Unown) from a DS game (Gen 4) that was RNG abused on an emulator. We can tell that this was achieved using an emulator due to the visible lua scripts/overlays on the bottom of the DS screen.
The above mentioned questions now have answers, it's time to head over to the relevant page on the proof guidelines. In this example we will be visiting the proof guidelines checklist and selecting DS -> Diamond -> Wild from the dropdown menu. We now need to ensure that the album we are looking at contains all of the required information listed on the guidelines page.
Figure 2 - Verifying the album
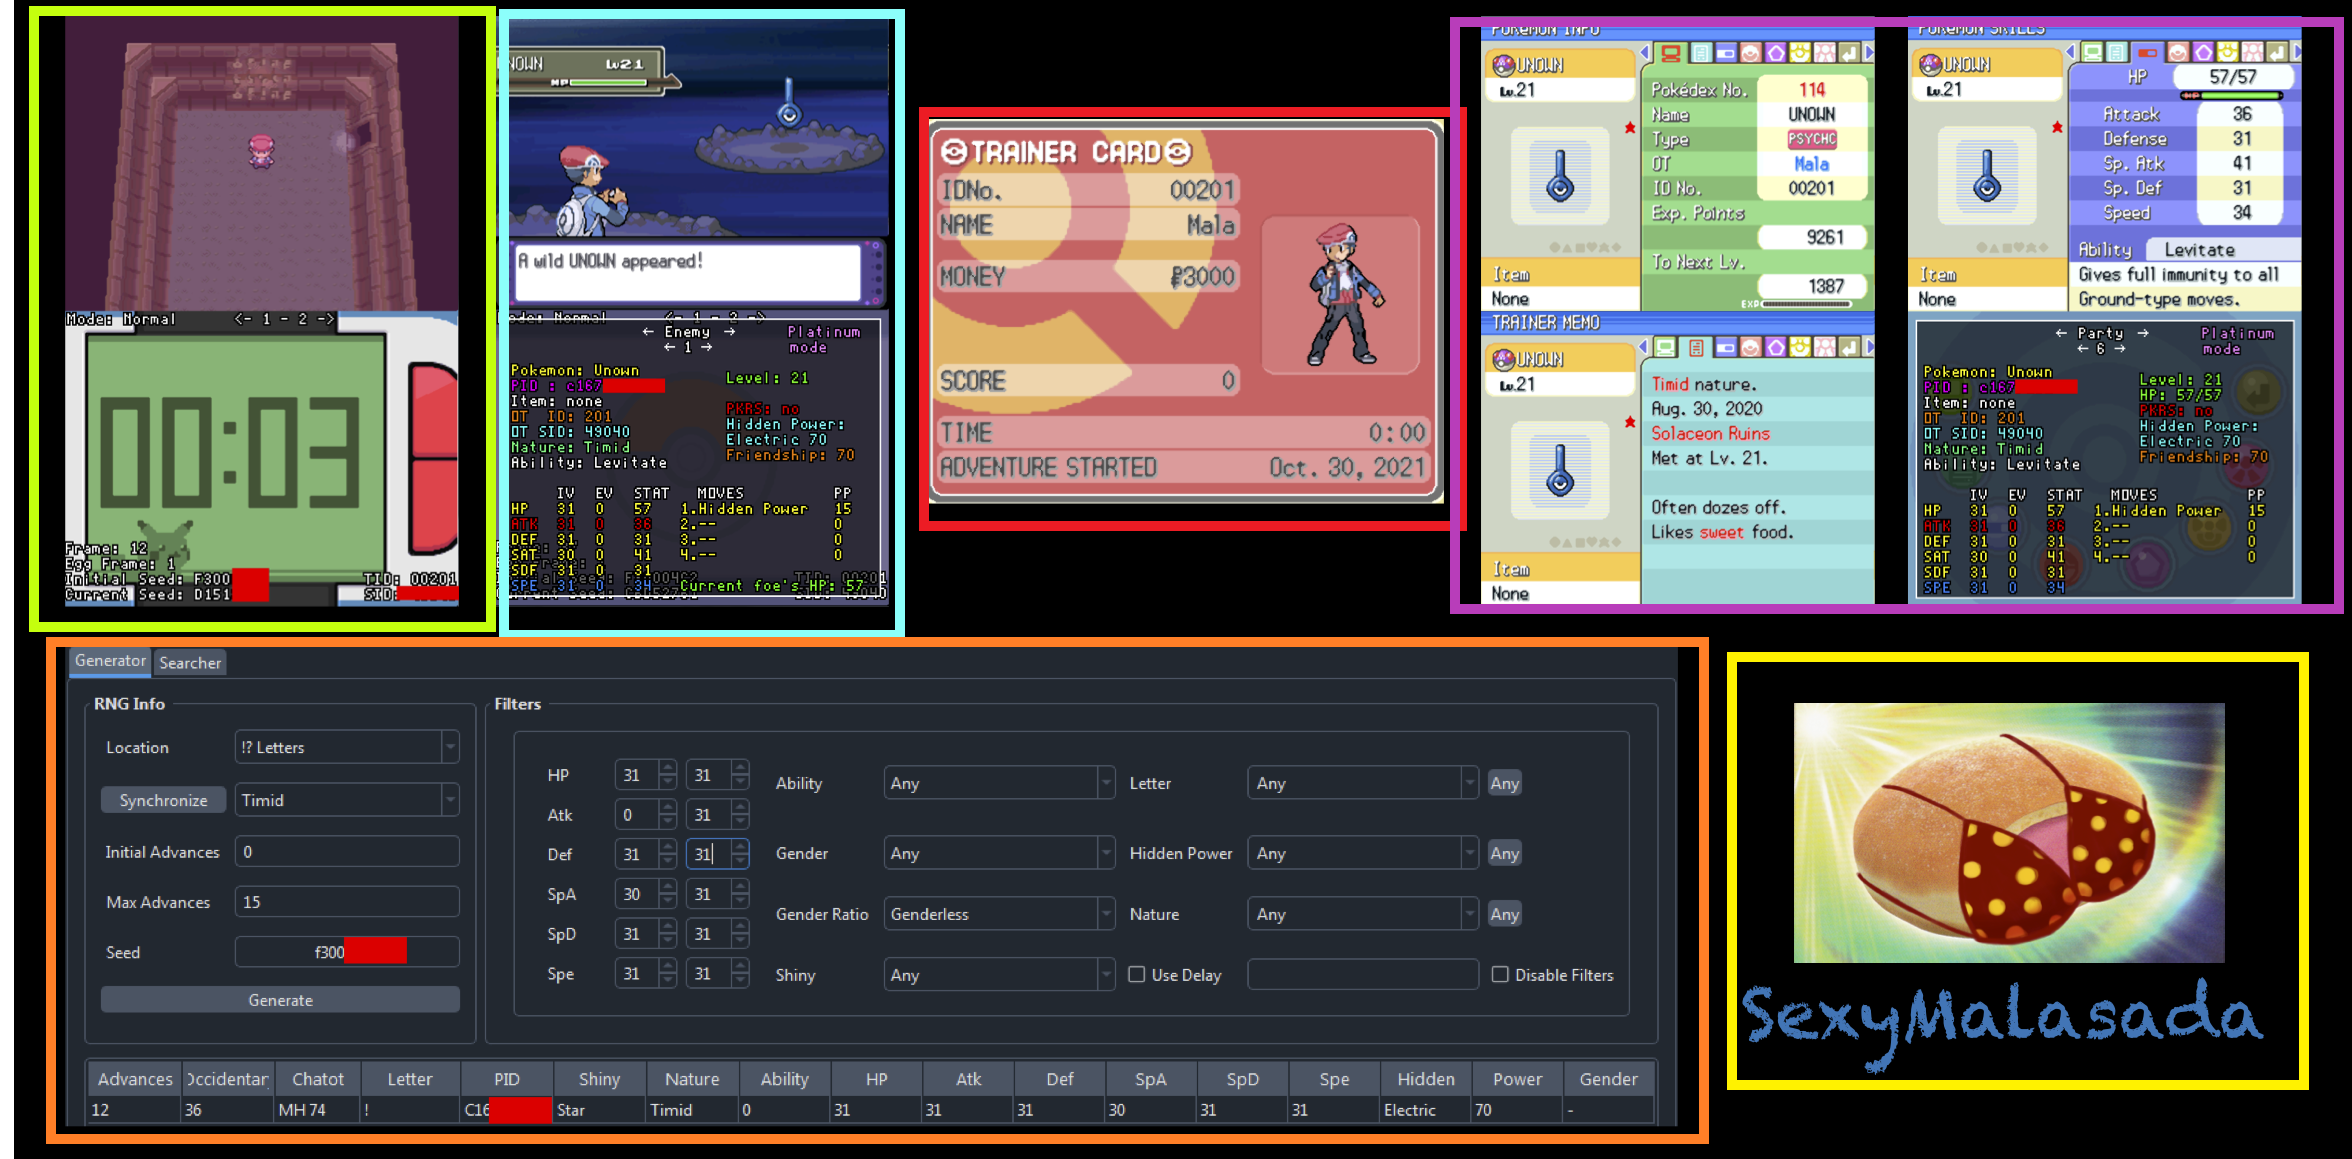
Guideline Requirements
- A screenshot of the frame before initiating encounter, with seeds and frames visible on the lua script. We can see this in the image surrounded by the GREEN border.
- A screenshot of the Pokemon in battle with the lua script displaying the Pokemon details. We can see this in the image surrounded by the SKY BLUE border.
- A screenshot of the Pokemon summary pages displaying the OT/TID and summary of the Pokemon. We can see this in the image surrounded by the PURPLE border.
- We can also a screenshot of the trainer card has been included. Shown in the image surrounded by the RED border.
- A screenshot of the RNG tool used to achieve a result, with the seed and PID/EC clearly on display. We can see this in the image surrounded by the ORANGE border.
- A watermark that contains the PS handle of the user that RNG abused the Pokemon. We can see this in the image surrounded by the YELLOW border.
The guideline does not ask for anything else, which means that we have now identified that this proof album contains all the details we need to see. Finally, we need to ensure that the details from the RNG abuse screenshot match the details shown on the emulator screenshots.
Figure 3 - Matching RNG tool information
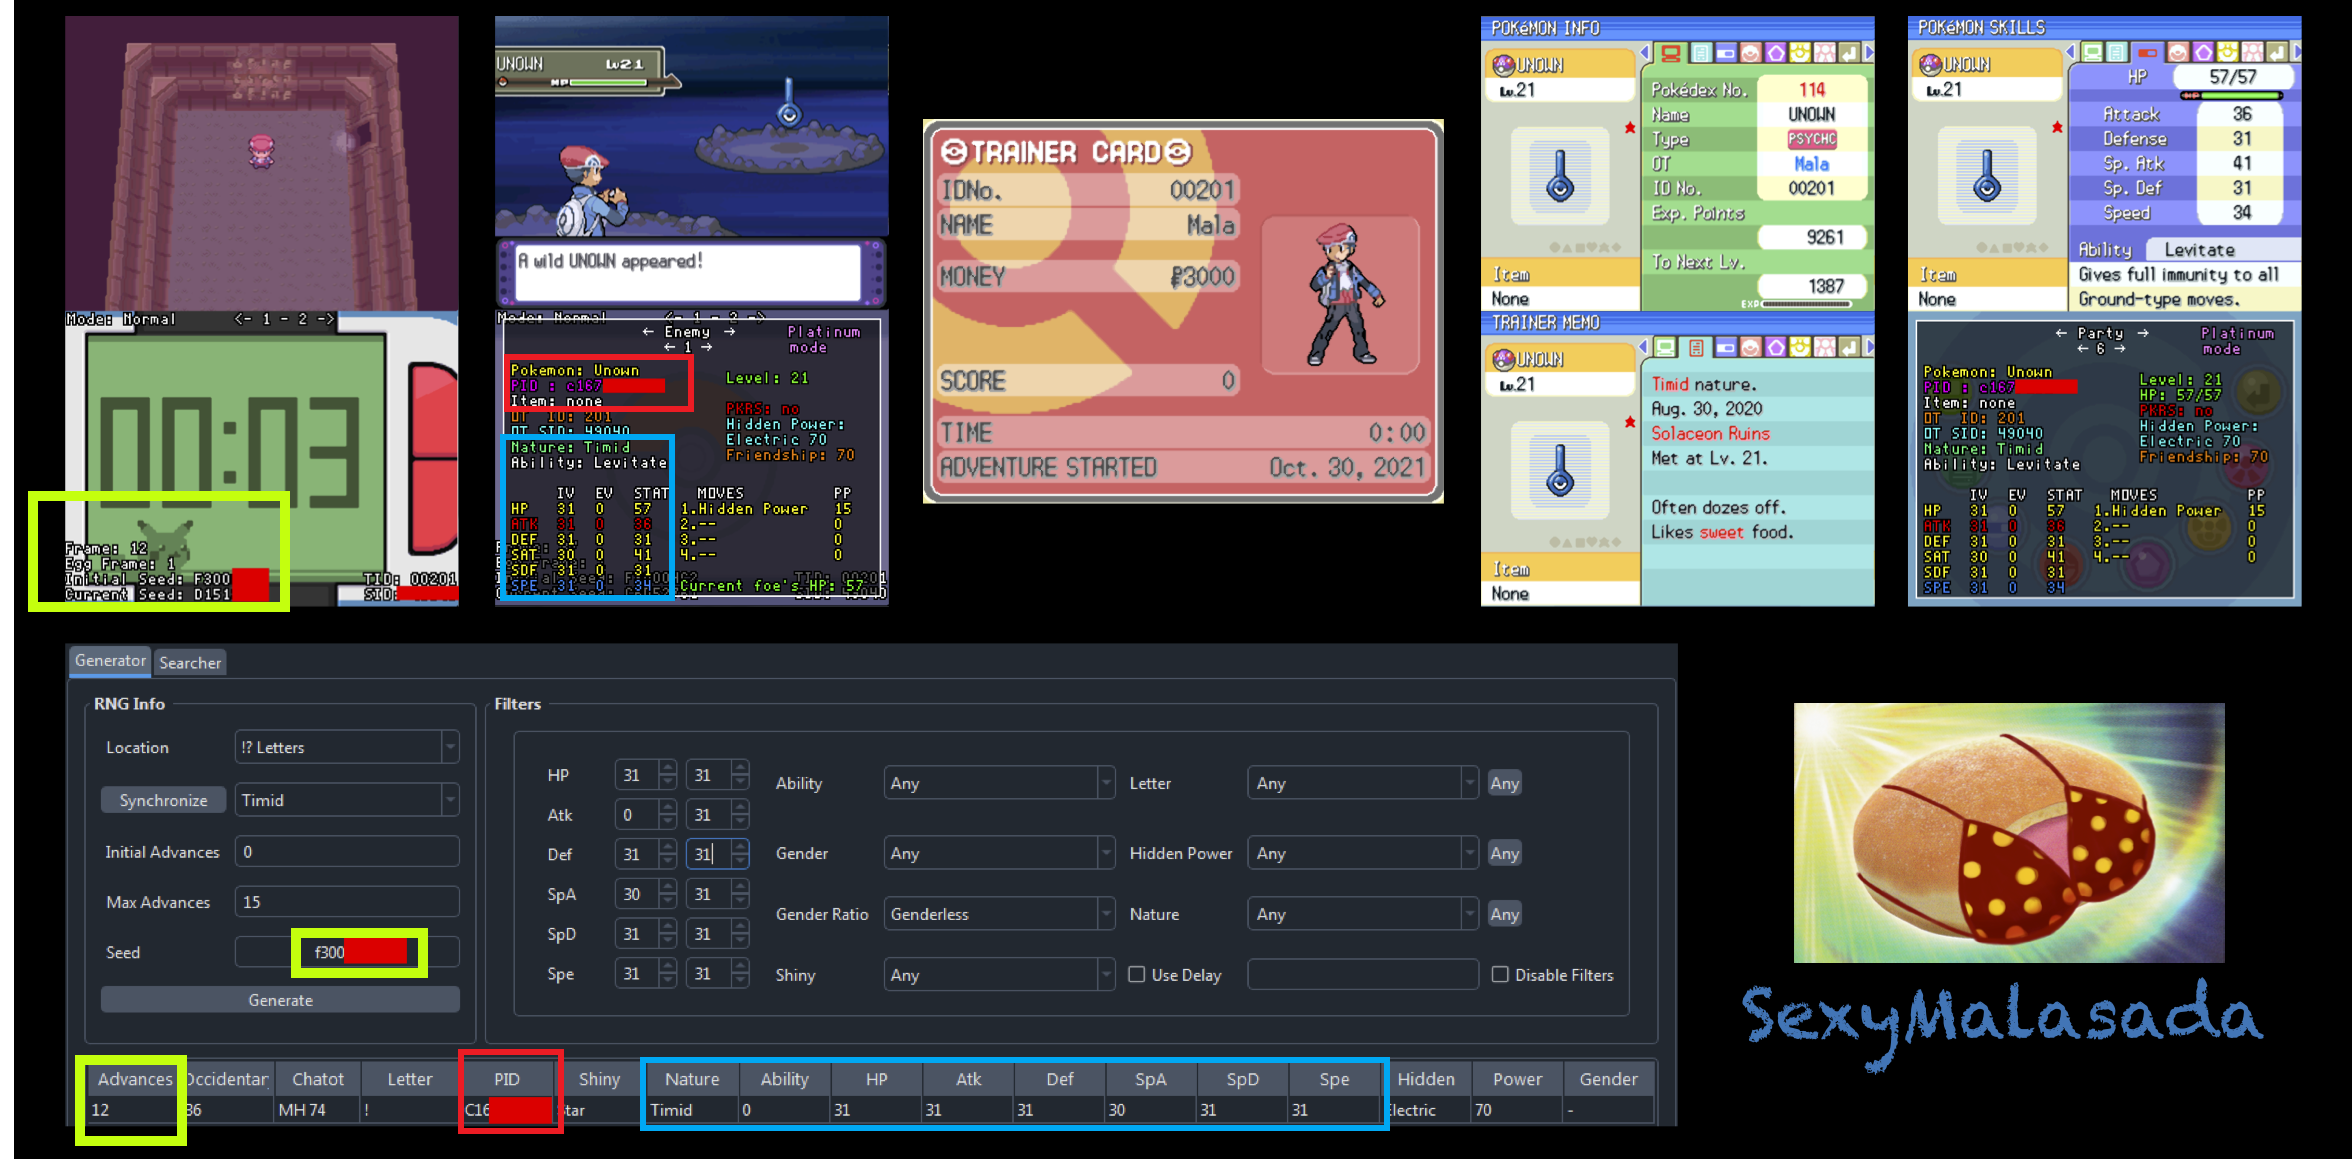
We can see that the initial seed of the emulator and the RNG tool screenshot both begin with F300, and that the advance count is also a match (advance/frame 12), this is enough proof to indicate that the Pokemon was encountered on the correct frame.
In the in-battle screenshots, we can see that the PID matches what is displayed on the RNG tool screenshot as well, the PID begins with C167 on both screenshots, and the IV/Nature combination is a perfect match (Timid 31/31/31/30/31/31)!
We have sucessfully verified that all of the details of this proof album are in order! You can use the skills you have learned from following this guide to verify any proof album that comes your way.
Checking Exercises
Here you can find different flawed proof albums, if you would like to sharpen your proof checking skills try to work out what is missing in each of these albums without viewing the answer first!
Use the checking method explained above to determine which portion of each of these albums is missing (if anything):
Test 1 - GBA Static Encounter
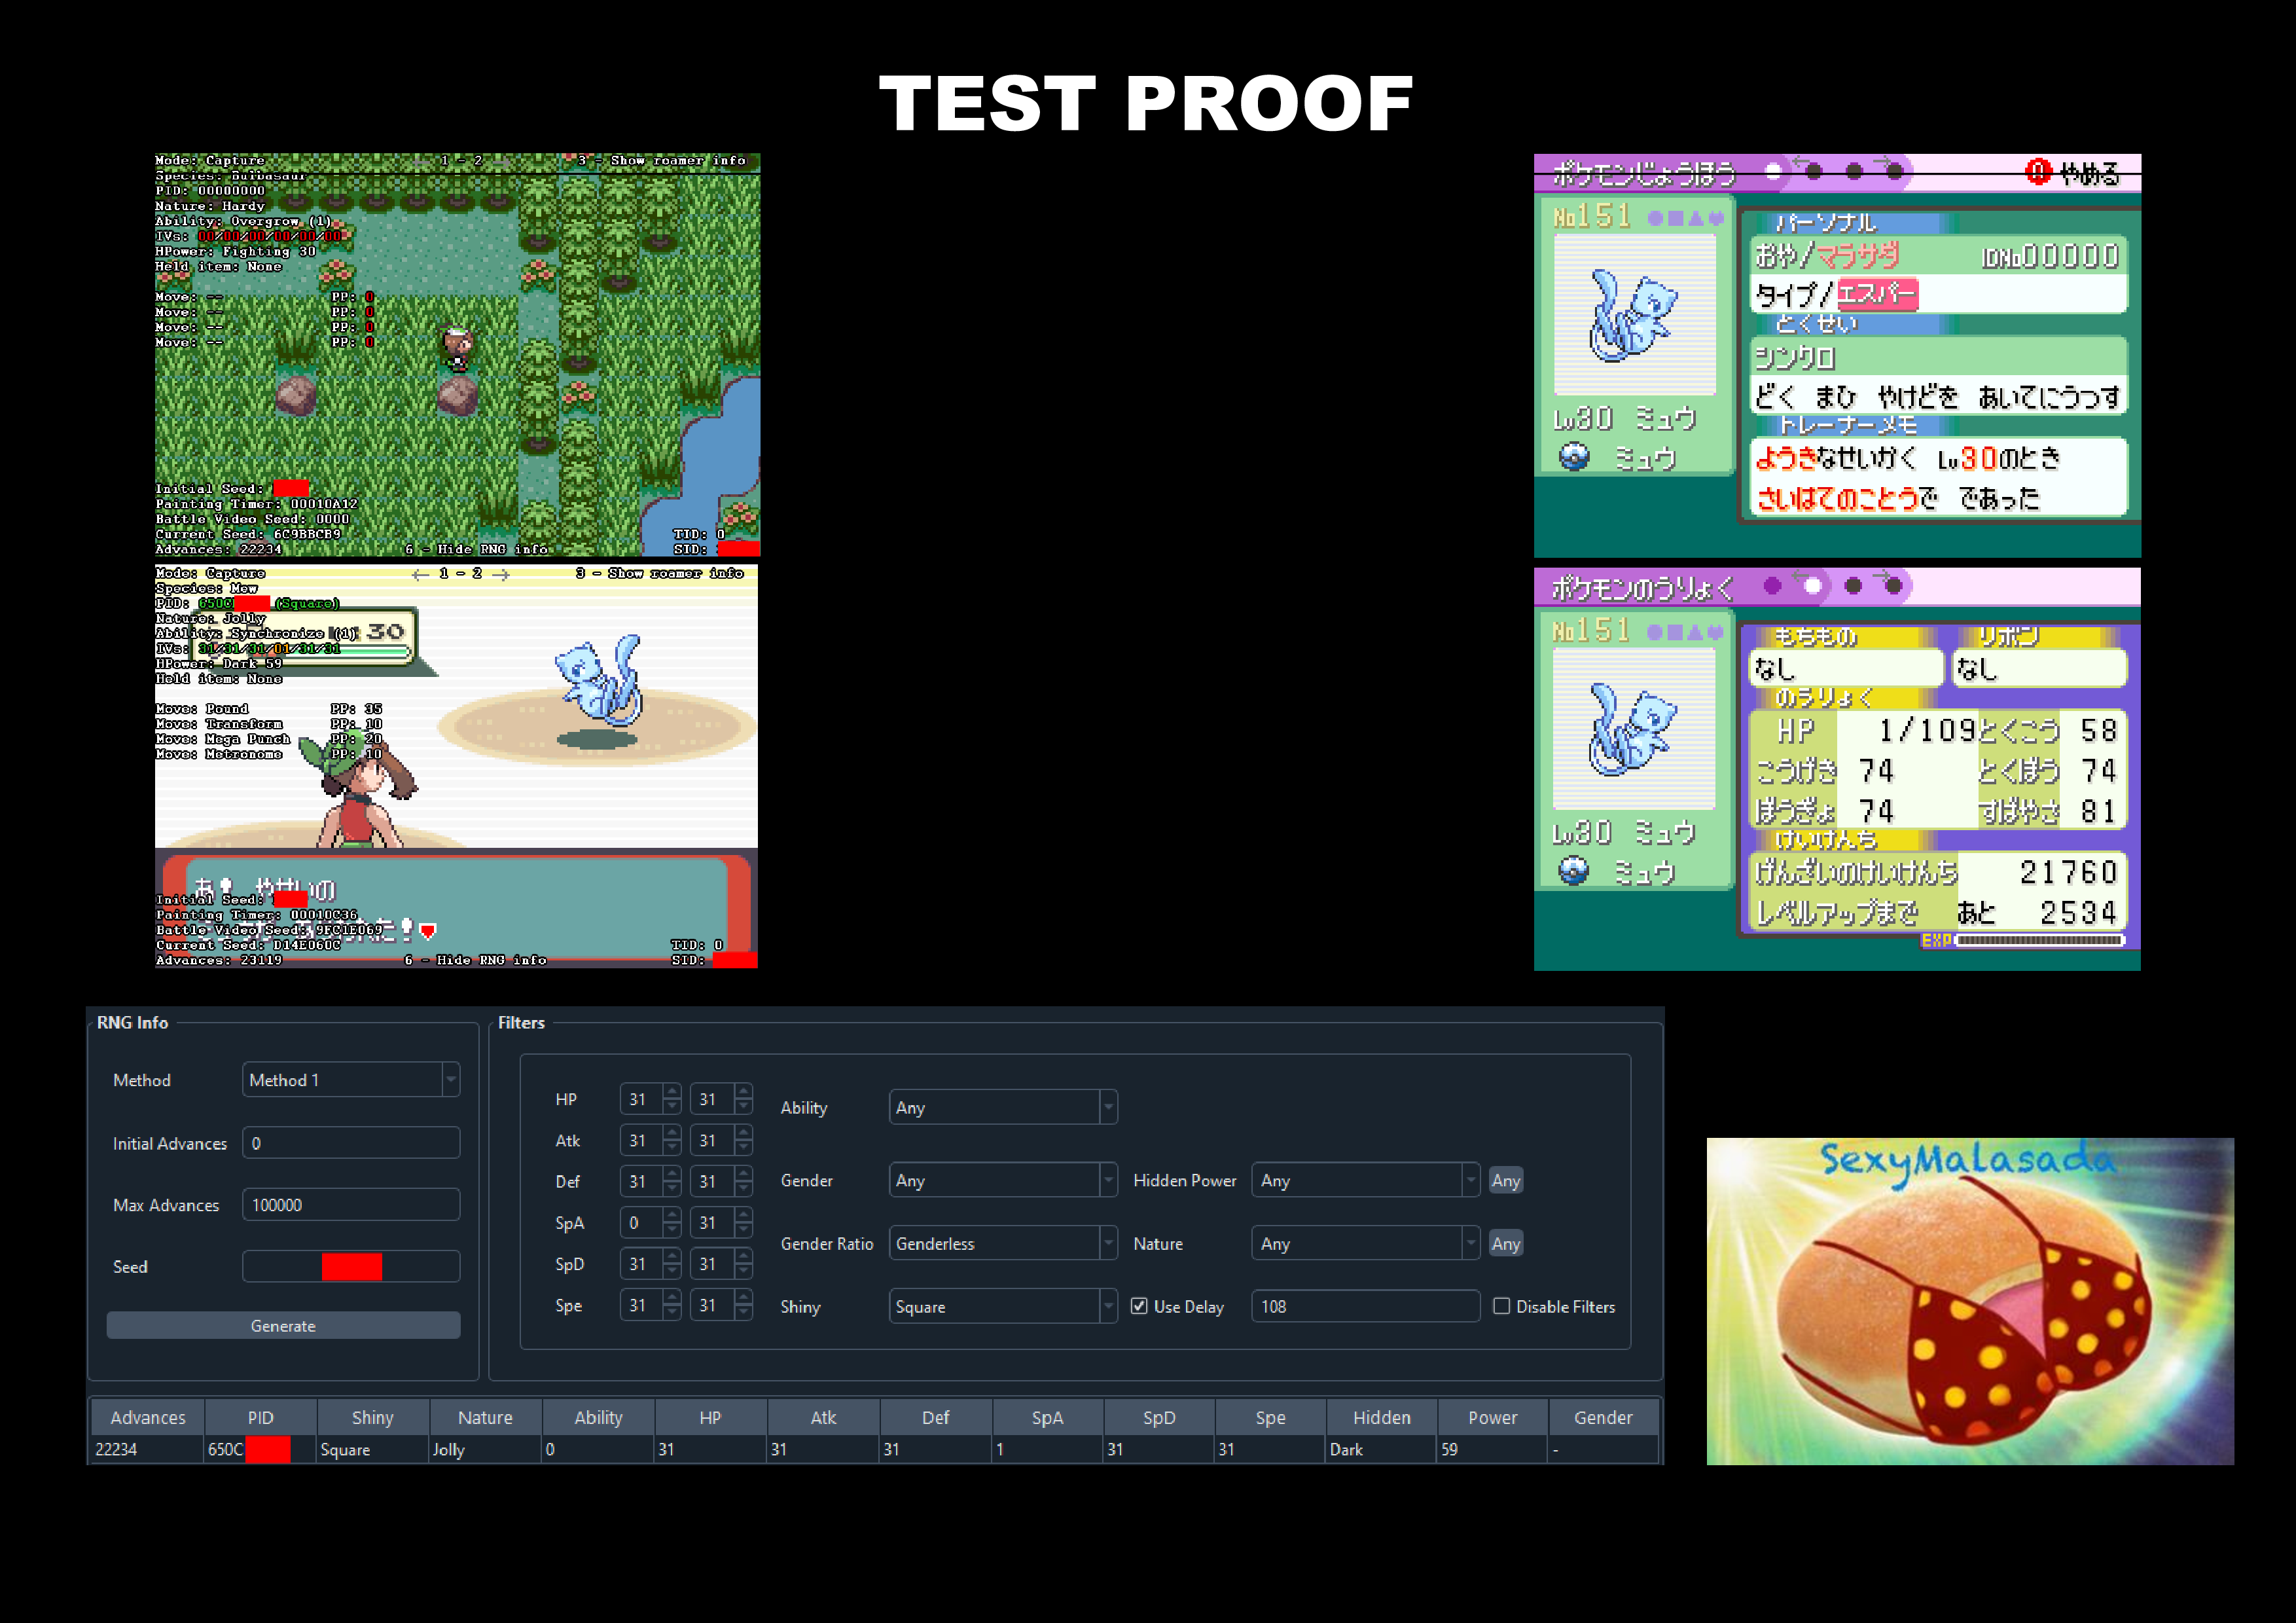
Answer - Seed (Sensitive information) is entirely blurred.
Test 2 - 3DS Mystery Gift
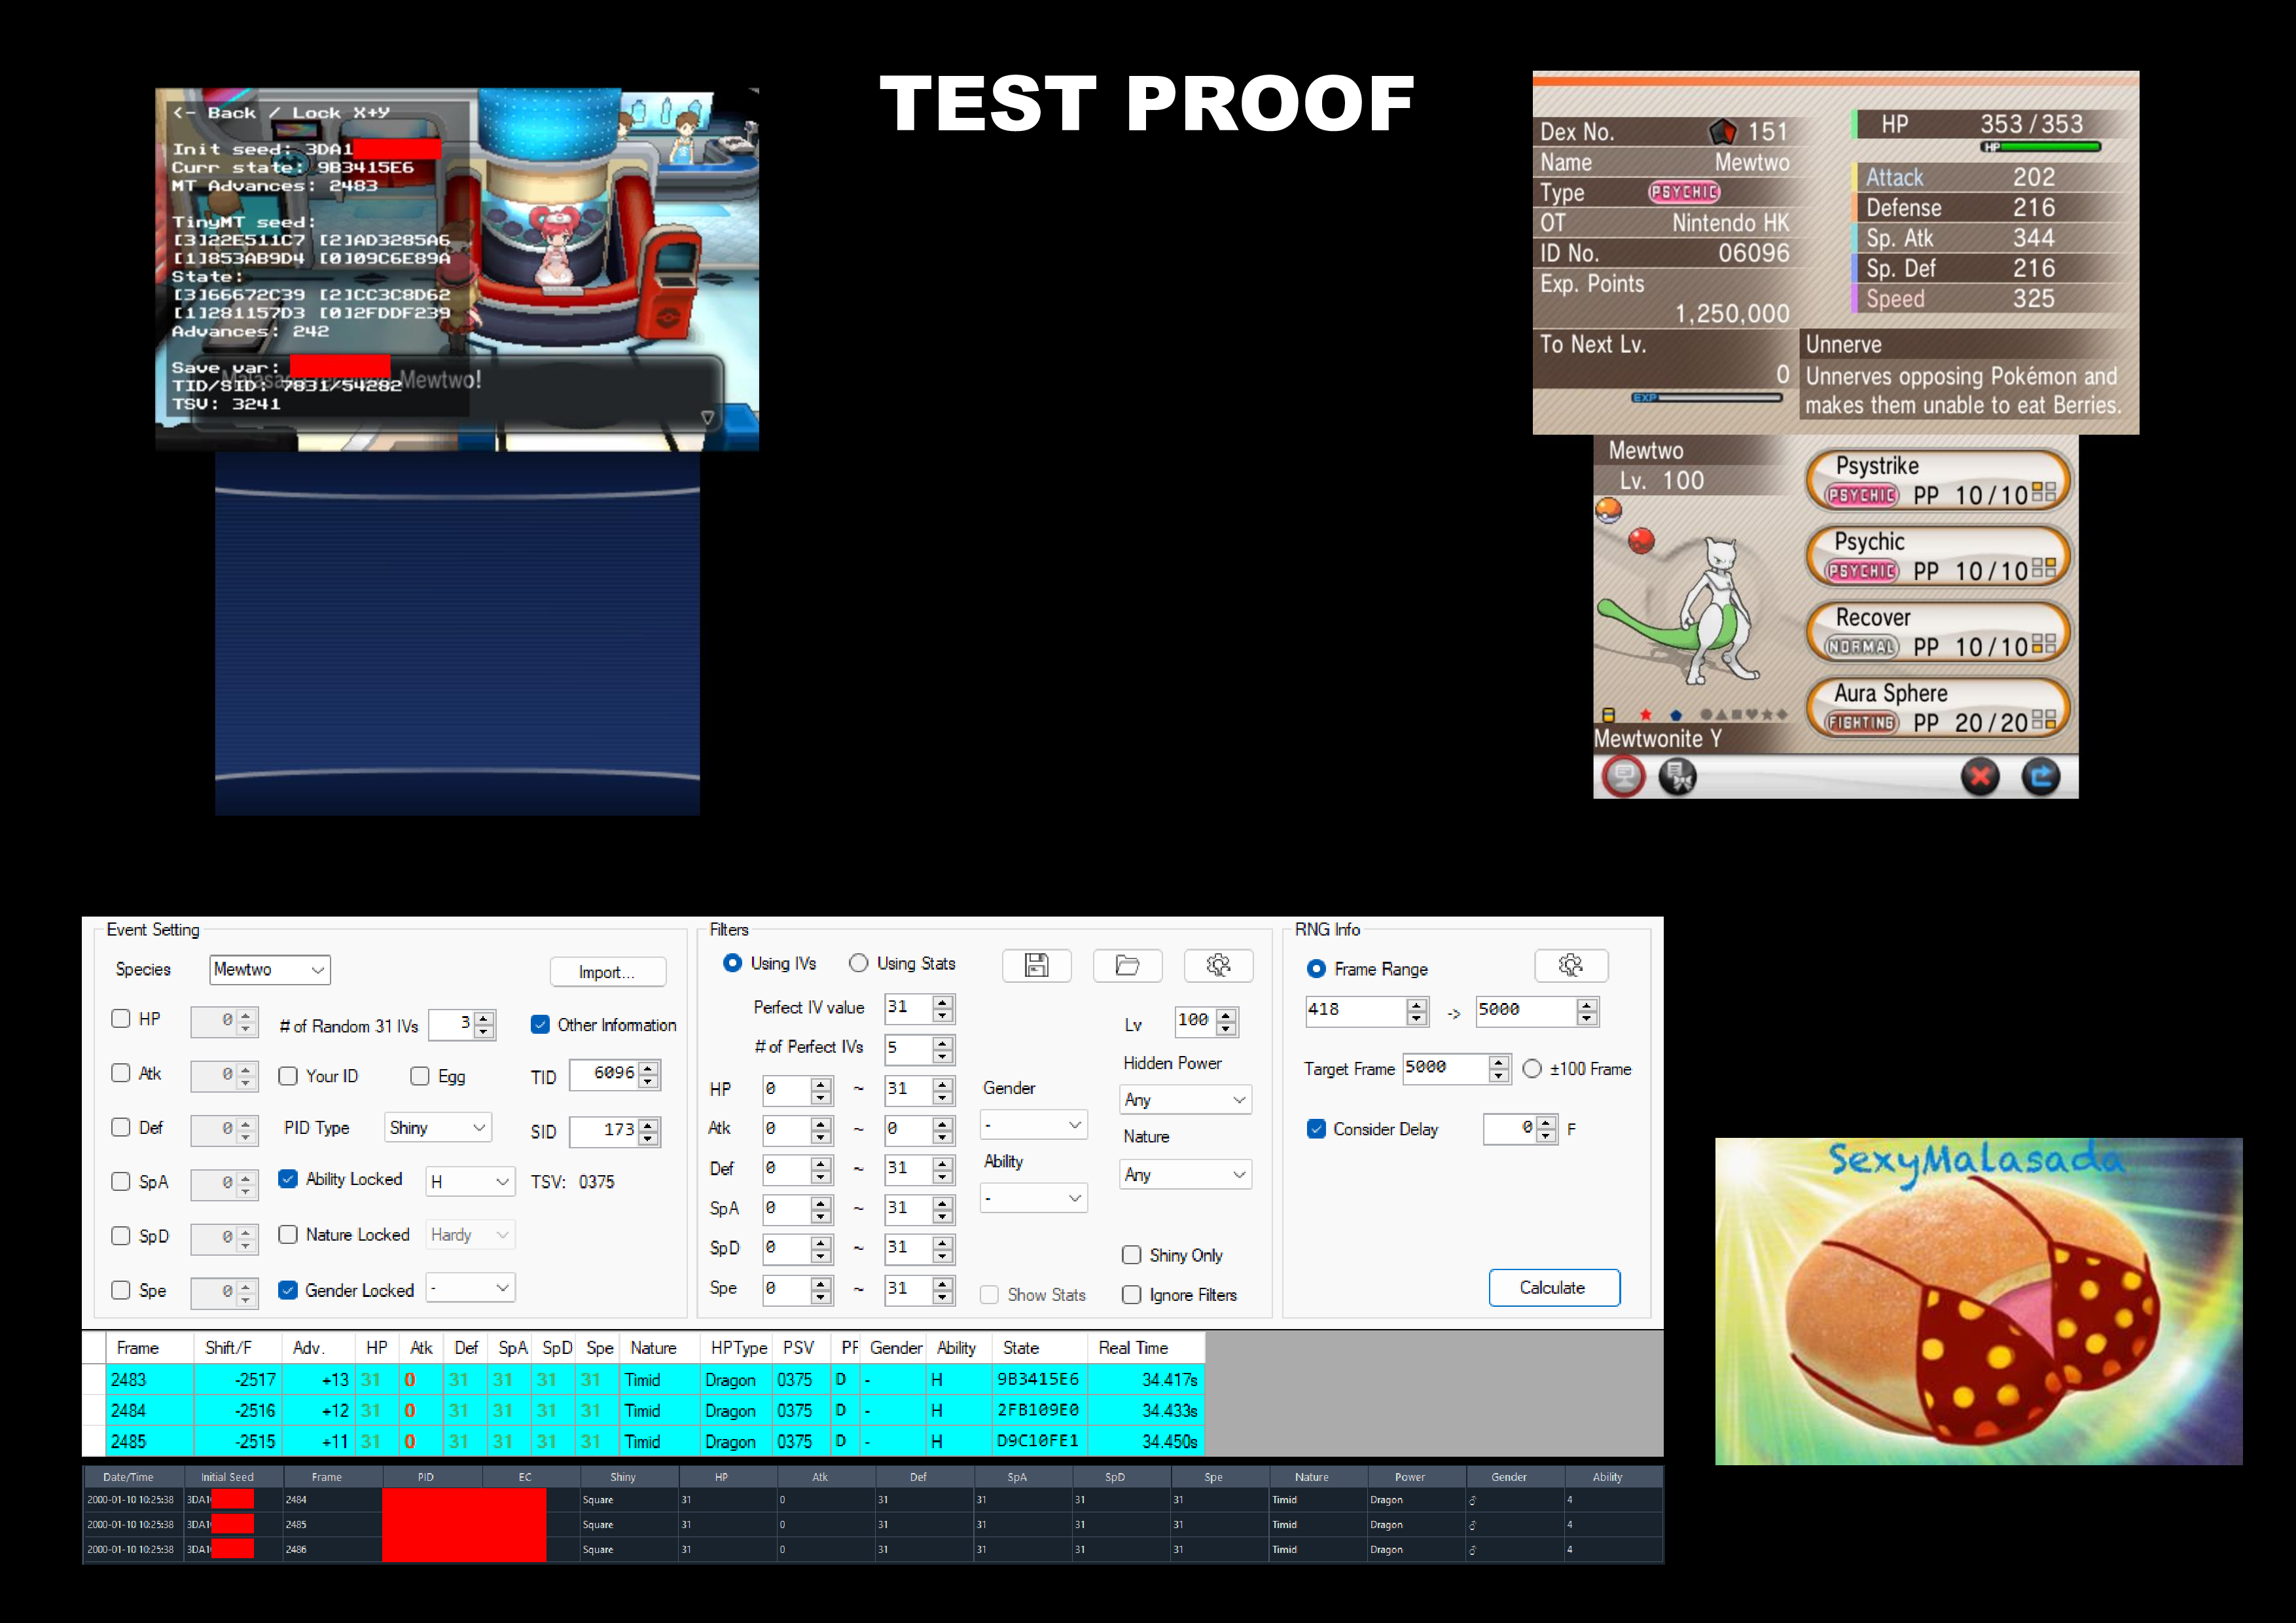
Answer - A required screenshot is missing (immediately after redemption screenshot).
Test 3 - DS Mystery Gift
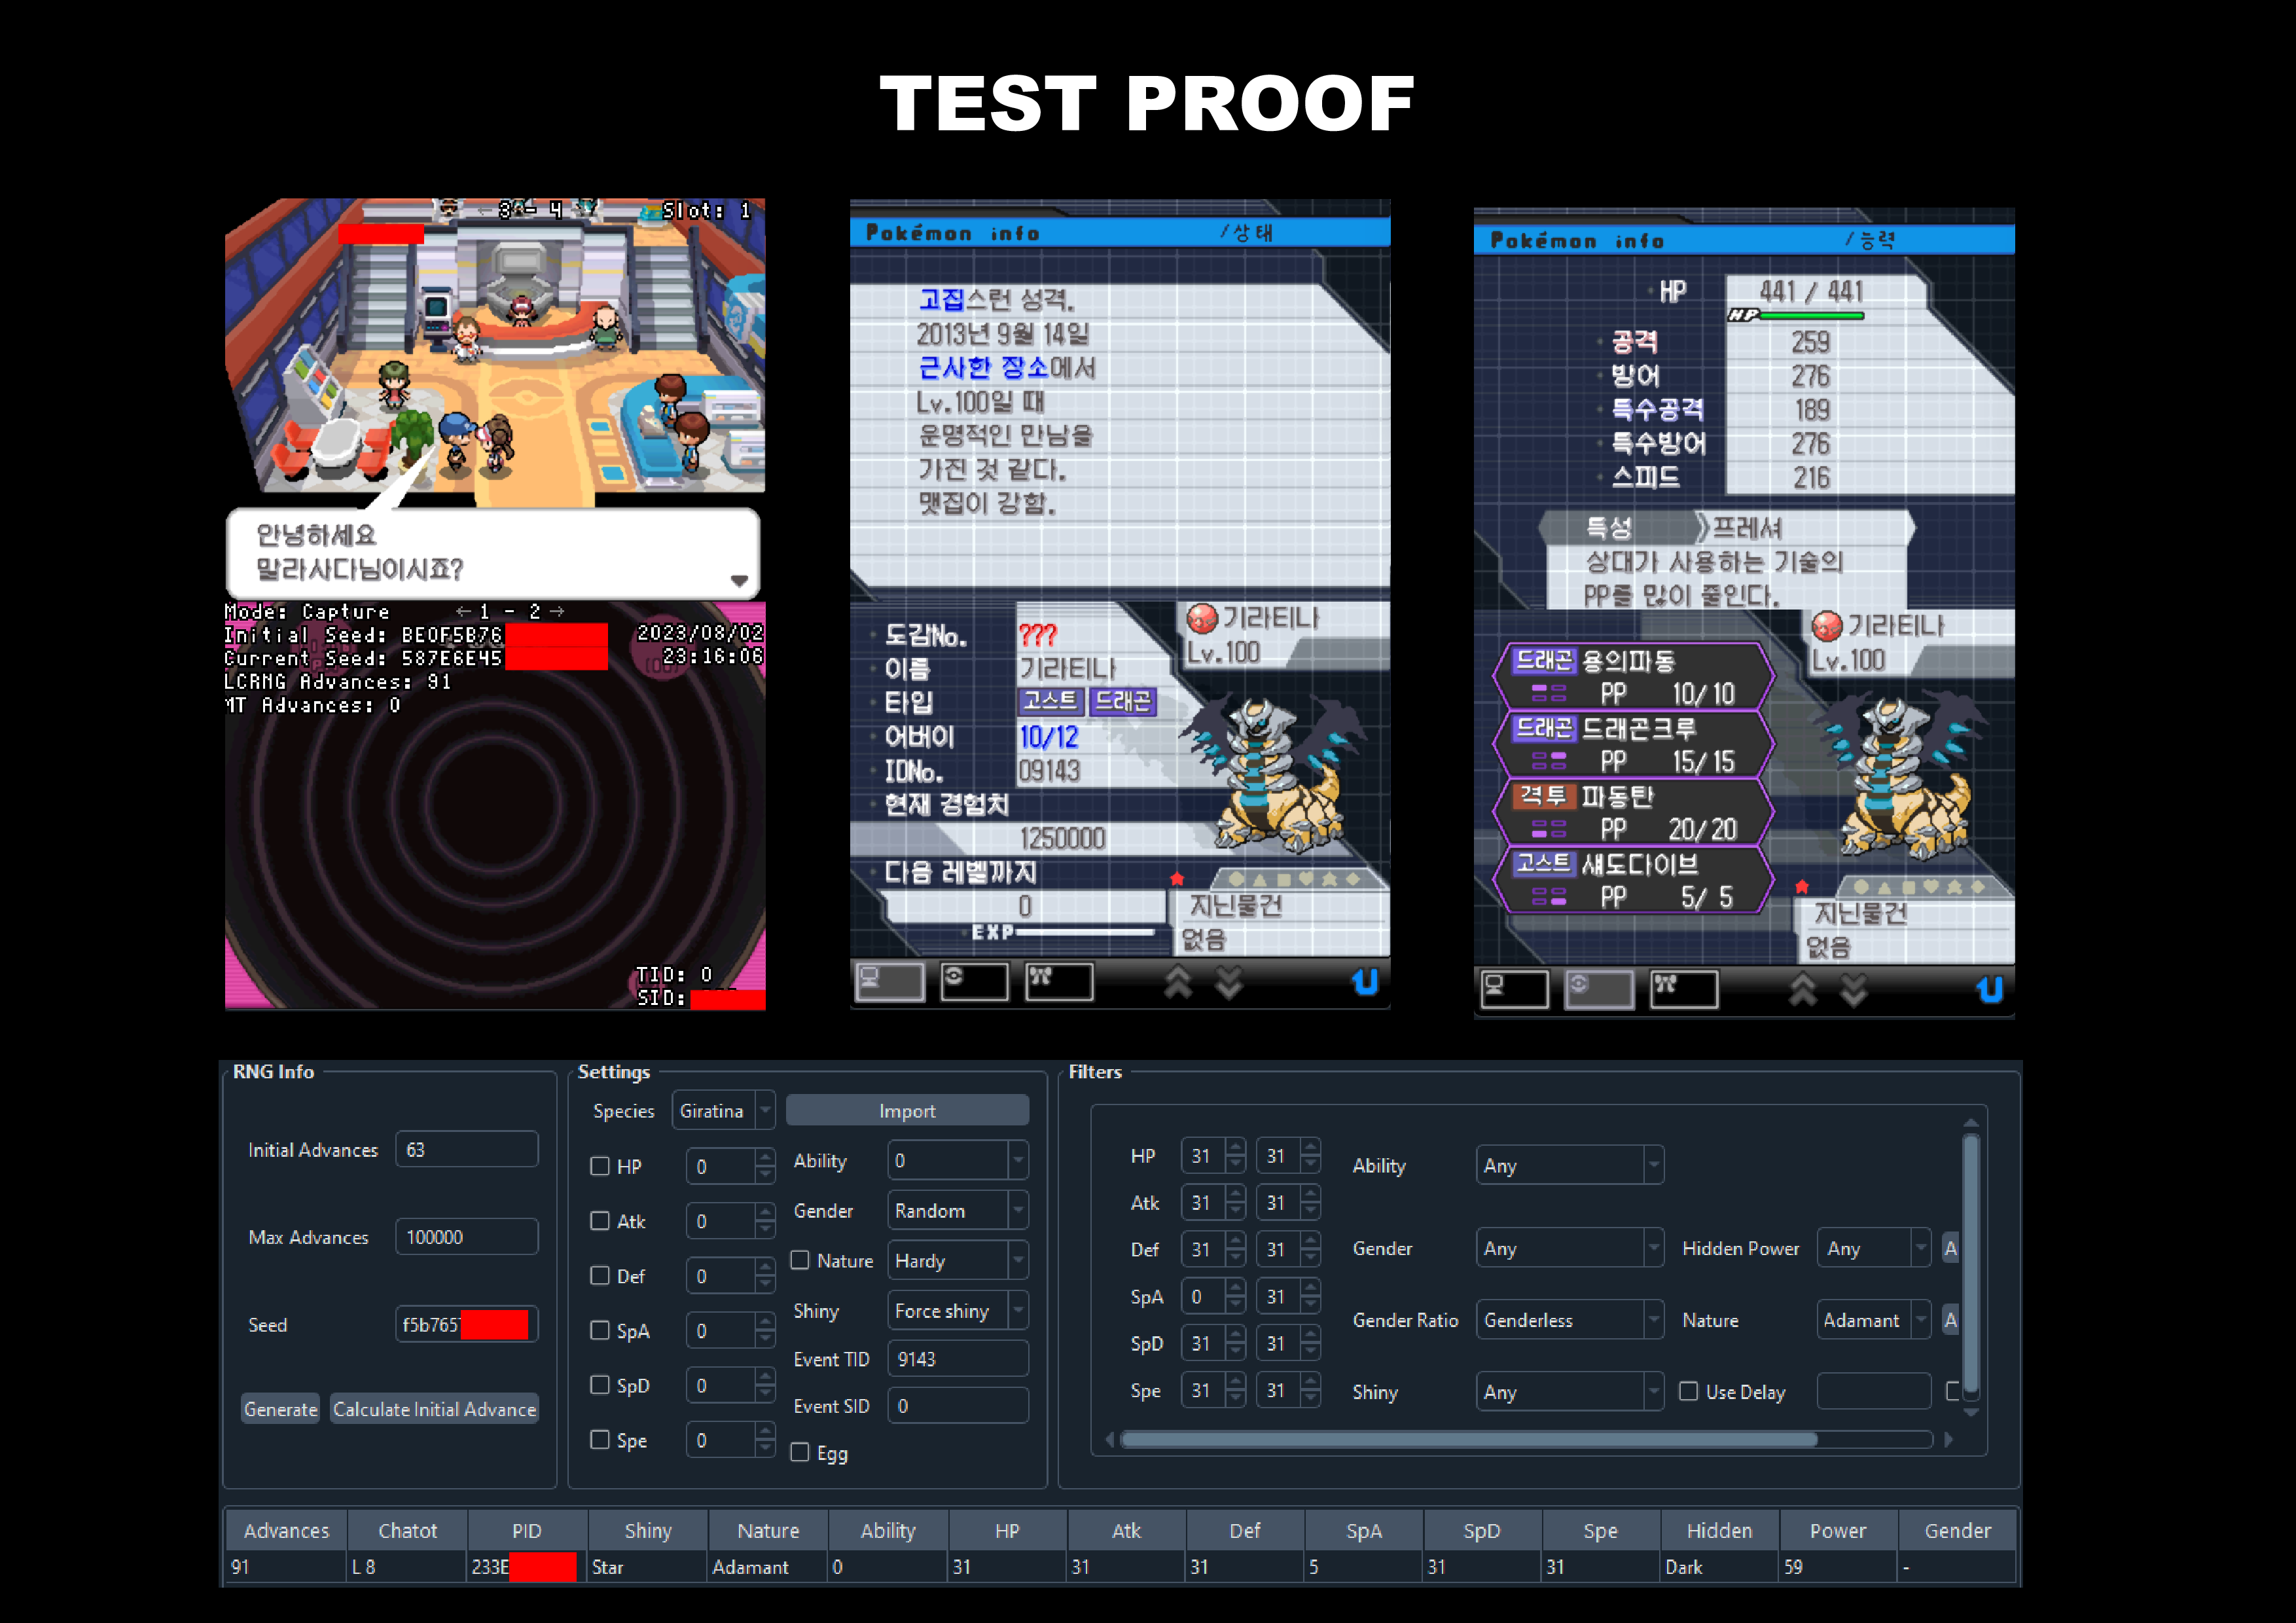
Answer - PS! Username is not present at all.
Test 4 - 3DS Static Encounter

Answer - RNG tool screenshots do not match game screenshots, seeds are incorrect.
Send me back to the Proof Guidelines!